


This article will cover deploying a Next.js applications on Google Cloud Run using GitHub Actions. Cloud Run is a fully managed platform that takes care of your infrastructure, allowing you to focus on building great applications. It automatically scales your app up or down, even to zero, depending on traffic. This guide will take you through the process of setting up your Next.js app, preparing the necessary Google Cloud configurations, creating a Docker image, and finally automating the deployment process with GitHub Actions.
repo: https://github.com/e-roy/next-cloud-run-app
Prerequisites to getting started:
A Google Cloud Platform (GCP) account.
Billing enabled on your GCP account to access Cloud Run services.
Docker installed on your local machine.
Node.js installed on your local machine.
A GitHub account.
Some basic understanding of Docker, Next.js, and GCP.
Why Deploy on Google Cloud Run
Deploying your Next.js application on Google Cloud Run offers a host of advantages, including seamless integration with a suite of powerful Google APIs, allowing you to effortlessly enhance your app's capabilities. As a fully managed serverless platform, Cloud Run abstracts away infrastructure concerns, enabling you to focus on writing code rather than managing servers. Moreover, it presents a compelling alternative to platforms like Vercel, especially for developers deeply invested in the Google Cloud ecosystem or those seeking to leverage specific Google services. With its pay-as-you-go model, Cloud Run ensures scalability and cost-effectiveness, making it an accessible and attractive option for deploying modern web applications.
Getting Started Creating a Next.js App
In your terminal run:
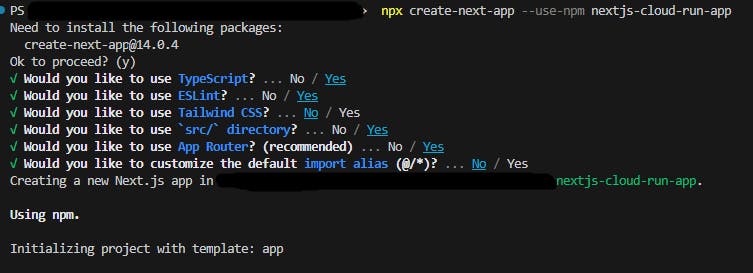
npx create-next-app --use-npm nextjs-cloud-run-app
This will start installing, I used the following choices below, but it shouldn't matter for this exercise.
Navigate into the directory:
cd nextjs-cloud-run-app
Start the development server:
npm run dev
and verify the app is running locally http://localhost:3000/
After verifying the app is running you can shut down your development server.
Set up a GitHub Repo
Go into GitHub and create a new repository. Once created initialize git
git init
Add the repo origin
git remote add origin <YOUR REPO ORIGIN>
Change from master to main
git branch -M main
Add all files
git add .
Create a new commit with the message "init"
git commit -m "init"
Then push to origin
git push -u origin main
Now you should have all your files on GitHub.
Set up Docker
Create a file in the root directory called Dockerfile
# base image
FROM node:18-slim

# Create and change to the app directory.
WORKDIR /usr/app

# Copy the rest of your app's source code from your host to your image filesystem.
COPY . .

RUN npm ci --only=production

# Build the application
RUN npm run build

# Command to run the app
CMD ["npm", "start"]
Also create a file .dockerignore file to keep any unnecessary files when deploying the container.
node_modules
.next
*.log
.git
.gitignore
Dockerfile
.dockerignore
README.md
package.json file's start script to: "start": "next start -p $PORT",
This will help start the app when on Cloud Run.
You can test build the image locally: (Be sure to shut down your previous development server)
docker build . -t nextjs-cloud-run-app
Then run the image:
docker run -p 3000:3000 -e PORT=3000 nextjs-cloud-run-app
and verify the app is running locally http://localhost:3000/
To stop, you can either use the Docker Desktop GUI, or you can open a new terminal
cd nextjs-cloud-run-app
Then you need to find the container ID or name by using the command
docker ps
Then to stop the container, use the command (replacing container_id_or_name)
docker stop <container_id_or_name>
Then you can add update your git
git add .
git commit -m "add docker"
Set up a GCP project
Create a new project in GCP if you haven't already.
In that project, search for "Cloud Run API" which should be under the marketplace and enable the API.

Now go to "Service Accounts" (quickest way is by the search bar)
Create a Service Account (button)
Add a service account name
Add a description (I use "Account for GitHub Actions" so it's easy to distinguish)
Create and Continue (button)
Add roles "Editor", "Storage Admin", "Cloud Run Admin", and "Service Account User".

Continue (button)
Done (button)
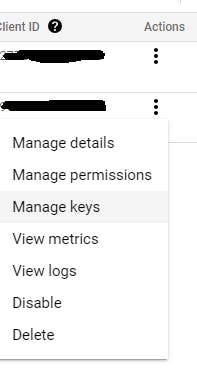
In the main table for "Service Accounts" on the far right there is a dropdown menu to select "Manage Keys"
"Add Key" (button)
"Create New Key"
"Create" a JSON type key, this will download the service account key
You will need to create a base64 string of this file. Change the file name to service-account.json and run this command in the terminal of the folder this file is in
$Content = Get-Content -Path 'service-account.json' -Raw
$Bytes = [System.Text.Encoding]::UTF8.GetBytes($Content)
$Encoded = [System.Convert]::ToBase64String($Bytes)
$Encoded | Set-Content 'service-account.base64.txt'
This will create a txt file with the base64 string.
Add GitHub secrets
Go to your repo into Settings > Secrets and variables > Actions
and add
CLOUD_RUN_PROJECT_NAME with the project_id that is found in yourservice-account.json file.
CLOUD_RUN_SERVICE_ACCOUNT with the base64 string we created in the past step
Set up GitHub Actions:
- Create a workflow file at
.github/workflows/cloud-run.ymlwith the following content:
name: next-cloud-run-app

on:
  push:
    branches:
      - master
      - main

env:
  PROJECT_ID: ${{ secrets.CLOUD_RUN_PROJECT_NAME }}
  REGION: us-east1
  # project-name but it can be anything you want
  REPO_NAME: next-cloud-run-app

jobs:
  build-and-deploy:
    name: Setup, Build, and Deploy
    runs-on: ubuntu-latest
    steps:
      - name: Checkout
        uses: actions/checkout@v4

      # Authenticate with Google Cloud
      - id: "auth"
        uses: "google-github-actions/auth@v2"
        with:
          credentials_json: "${{ secrets.CLOUD_RUN_SERVICE_ACCOUNT }}"

      # Setup gcloud CLI/SDK
      - name: Set up Cloud SDK
        uses: google-github-actions/setup-gcloud@v2

      - name: Authorize Docker push
        run: gcloud auth configure-docker

      - name: Build and tag the docker image
        run: |-
          docker build . --tag gcr.io/$PROJECT_ID/$REPO_NAME:$GITHUB_SHA

      - name: Push the image to the Google Container Registry (GCR)
        run: |-
          docker push gcr.io/$PROJECT_ID/$REPO_NAME:$GITHUB_SHA

      - name: Deploy
        run: |-
          gcloud run deploy $REPO_NAME \
          --region $REGION \
          --image gcr.io/$PROJECT_ID/$REPO_NAME:$GITHUB_SHA \
          --platform "managed" \
          --set-env-vars "CLOUD_RUN_PROJECT_NAME=${{ secrets.CLOUD_RUN_PROJECT_NAME }},CLOUD_RUN_SERVICE_ACCOUNT=${{ secrets.CLOUD_RUN_SERVICE_ACCOUNT }}" \
          --quiet
Now with the secrets in place, when you commit this file, the workflow should automatically build and deploy the application.
If you go to your GitHub repo you should see the Action running.
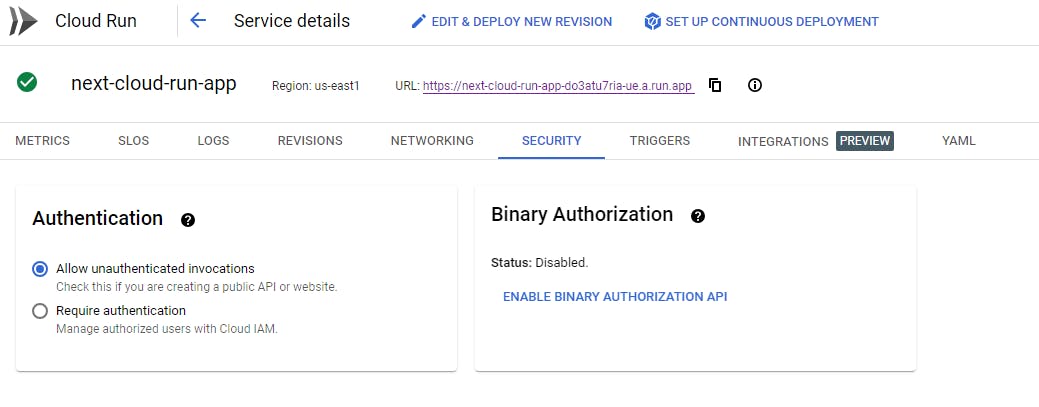
Once the action is complete, you will now need allow unauthenticated visitors to view the site.
Go to the Cloud Run product and click on the your new deployed app and click on the "Security" tab and switch authentication to the "Allow unauthenticated invocations" bullet. The url you see is where your app is deployed.
A word of caution
Every time you merge to main, you will create a new image. Google is really inexpensive, but as your app grows and adding more commits, the number of images will grow. You can visit "Container Registry" to see and manage images.
Conclusion
Deploying your Next.js application to Google Cloud Run is a straightforward and efficient process that uses the simplicity of GitHub Actions and the flexibility of containerization with Docker. With the steps outlined in this blog, you have the know-how to take your Next.js project from local development to a fully managed serverless execution environment, ready to handle real-world traffic.